Rapid Prototyping with AI: Your guide to building with Cursor.
Go beyond static Figma prototypes! Explore intelligent prototyping tools and techniques for creating dynamic, user-centered experiences.
Last week, I explored why traditional Figma prototypes are falling short. Now, it’s time to dive into my preferred solution: Cursor, an AI-powered code editor that’s changing my design workflows.
Unlike other AI tools like Bolt.new and Lovable.dev, Cursor is a code editor built on top of VS Code. For me this has many advantages. You can work with existing code along side your engineers by creating a playground branch in Github, add in your design system that your team is using and still leverage AI to help you understand and generate code. It provides more flexibility in exchange for a longer setup process.
This article will layout my personal setup for using Cursor and the tools I use to get started.
First. It’s not Figma vs Cursor its Figma AND Cursor
Figma and Cursor aren’t competing tools; they’re a dynamic duo in your design workflow.
Figma is your creative playground. It's perfect for mapping out user journeys, exploring various visual directions, and setting the overall look and feel of your product. It's where you think big and explore ideas with your team.
Cursor is your precision tool. It lets you zoom in on the fine details, ensuring every micro-interaction is just right. With Cursor, you can quickly test design ideas, iterate on animations, and validate your concepts with working code — bringing an extra level of fidelity and realism to your prototypes.
Together, Figma and Cursor create a powerful workflow that takes you from the initial concept to an interactive, high-fidelity prototype.
Setting Up Your Prototyping Environment
This article will walk through the high level tools and steps I go through.
For a more detailed walkthrough follow along with the YouTube video I created in tandem with this article.
Cursor: Download and install Cursor if you haven’t already.
GitHub Account: If you don’t have one, create an account. It will be your central hub for storing and managing your code.
 GitHub Desktop: Download and install GitHub Desktop for a visual way to interact with your repositories. It makes cloning, pushing, and pulling changes a breeze.
Vercel Account: Sign up for Vercel and log in with your GitHub credentials. Vercel provides a platform for deploying and hosting your Next.js projects.
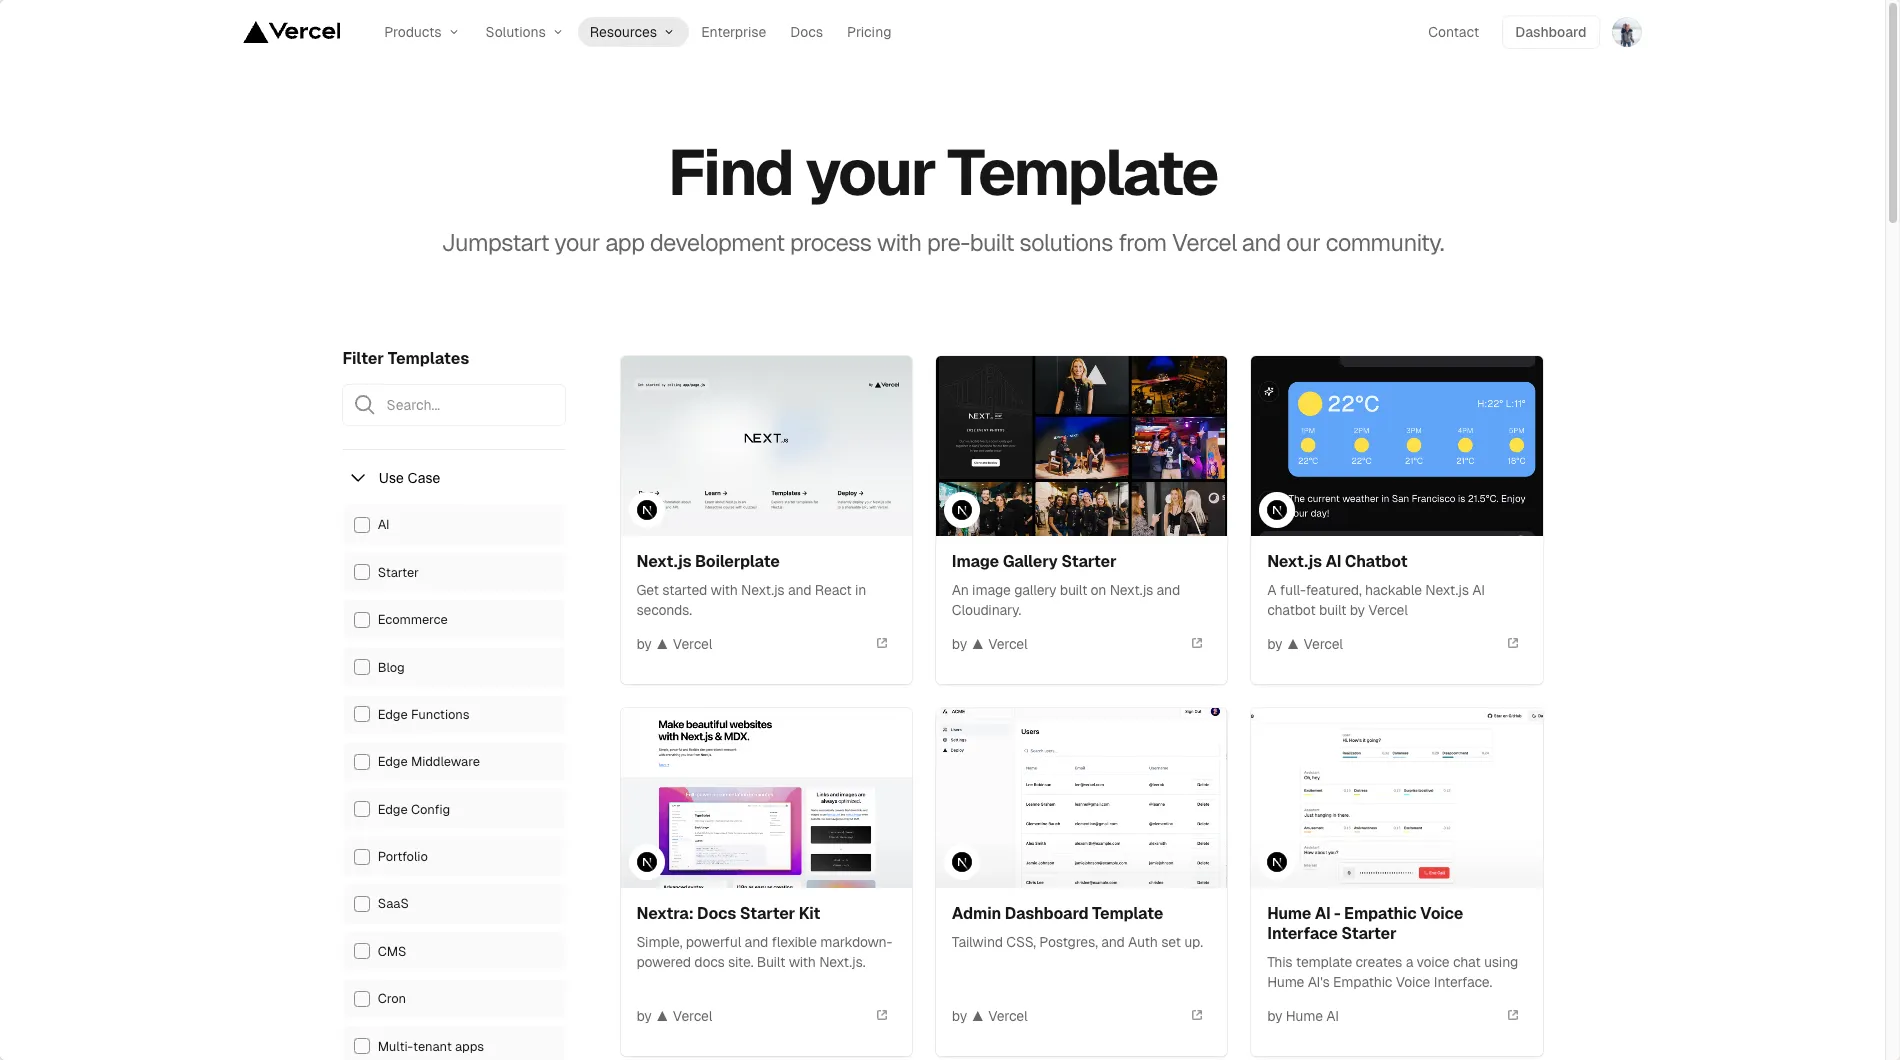
Next.js Template: Visit the Vercel templates library and select the Next.js Boilerplate to kickstart your project.
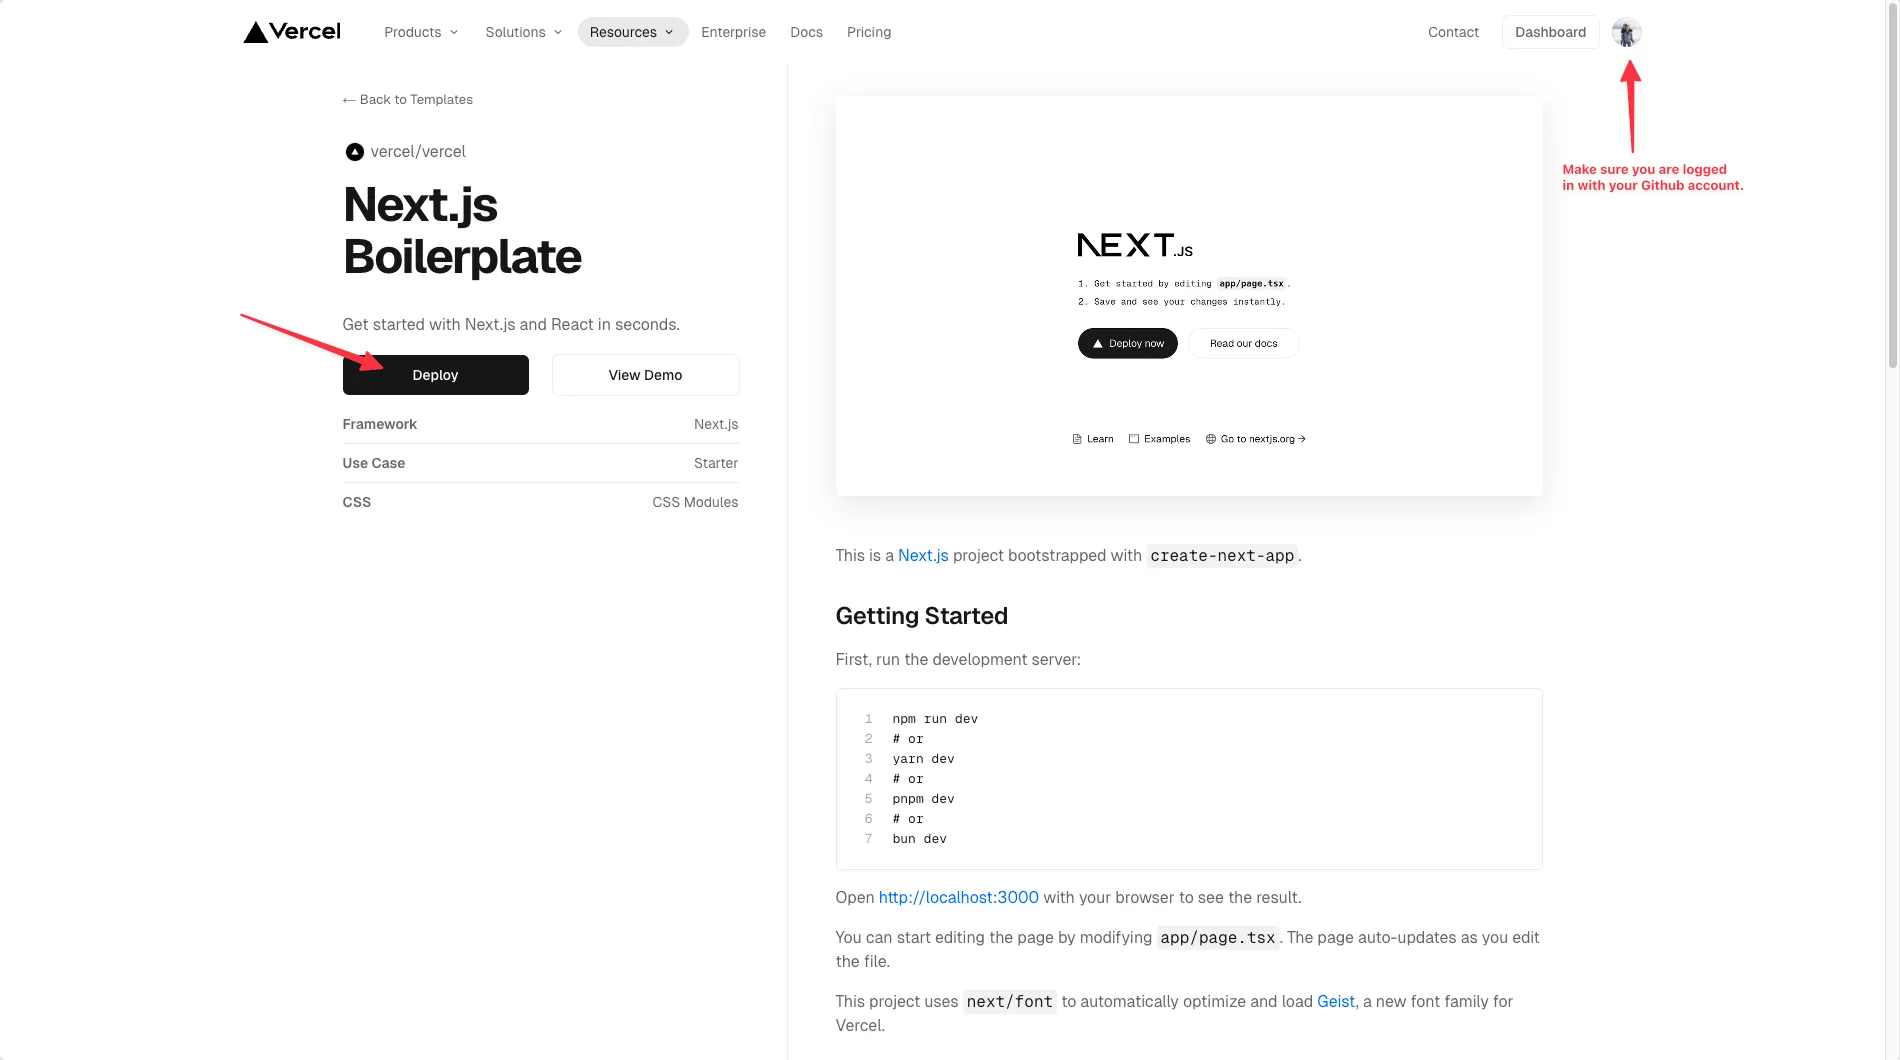
Deploy Your Template: Click the “Deploy” button on the Next.js template page. This step publishes your template to Vercel, giving you a hosted URL and creating a GitHub repository automatically.
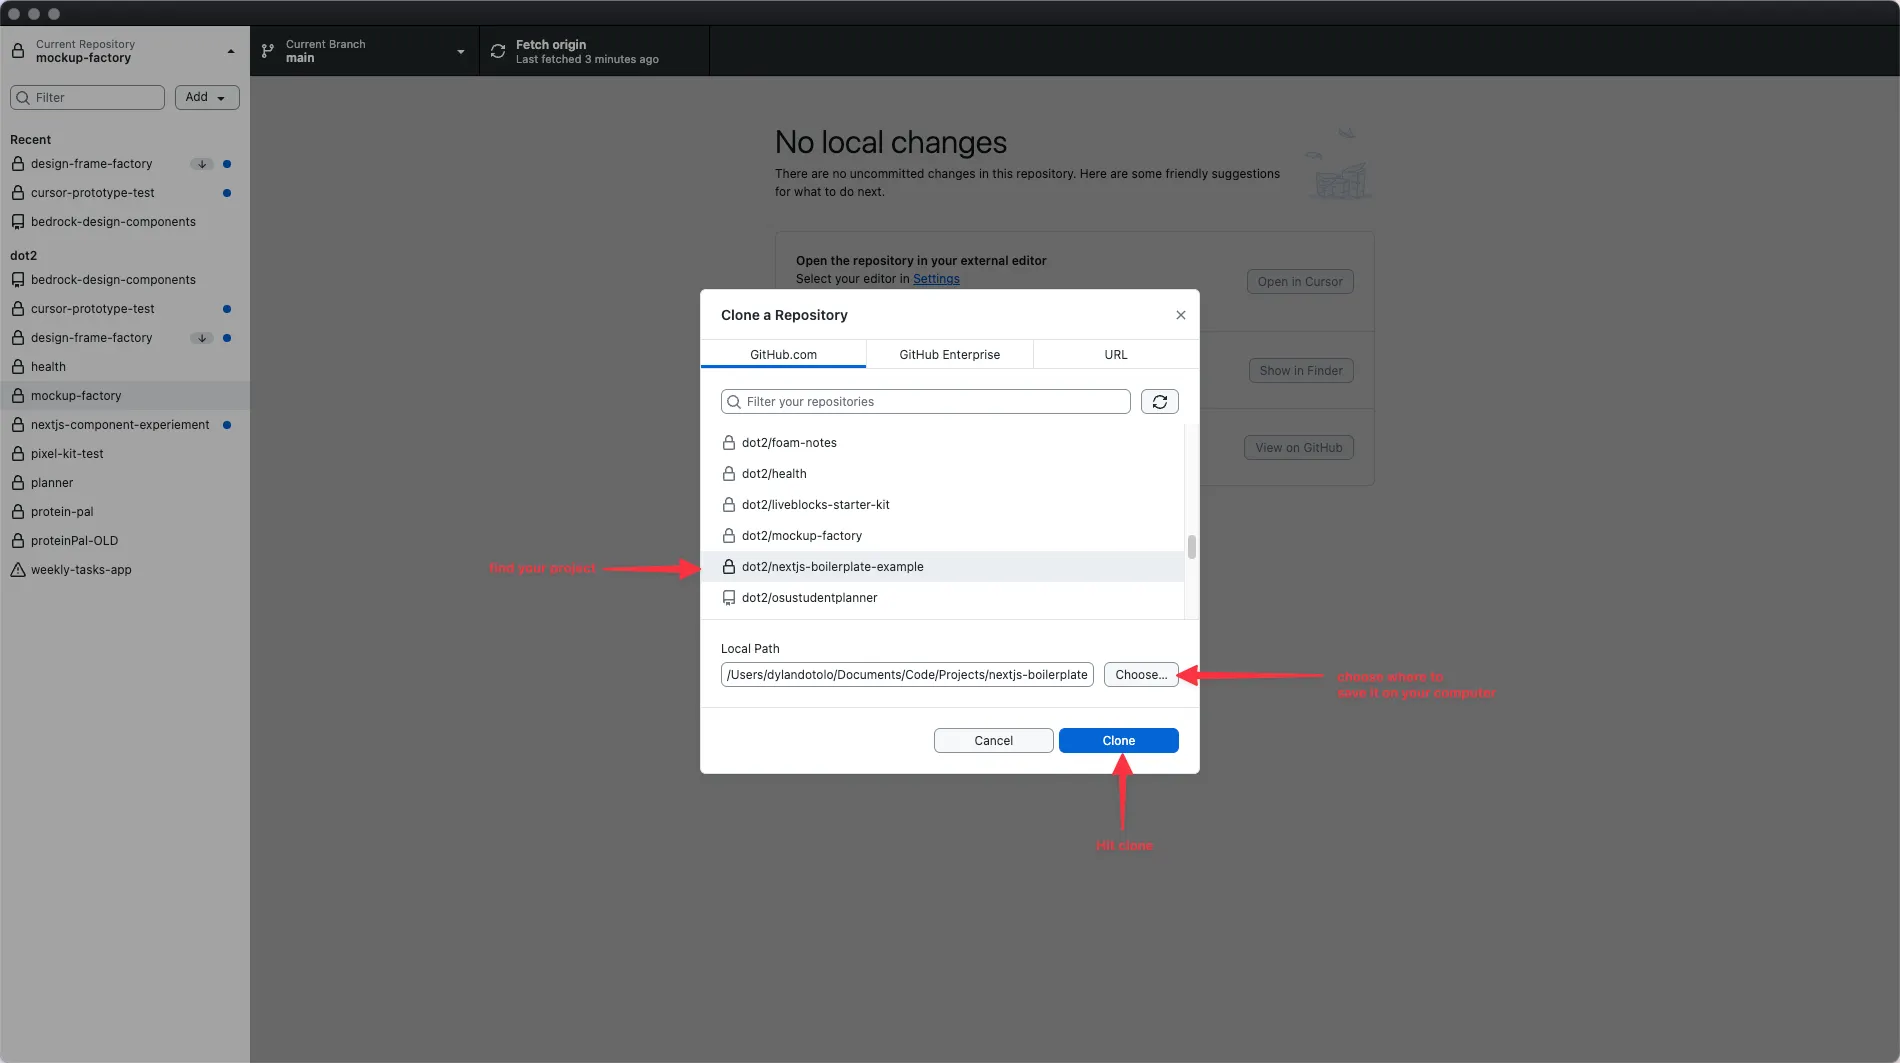
Clone the Repository: Use GitHub Desktop to clone your new repository to your local machine. Choose the directory where you want to store your project files.
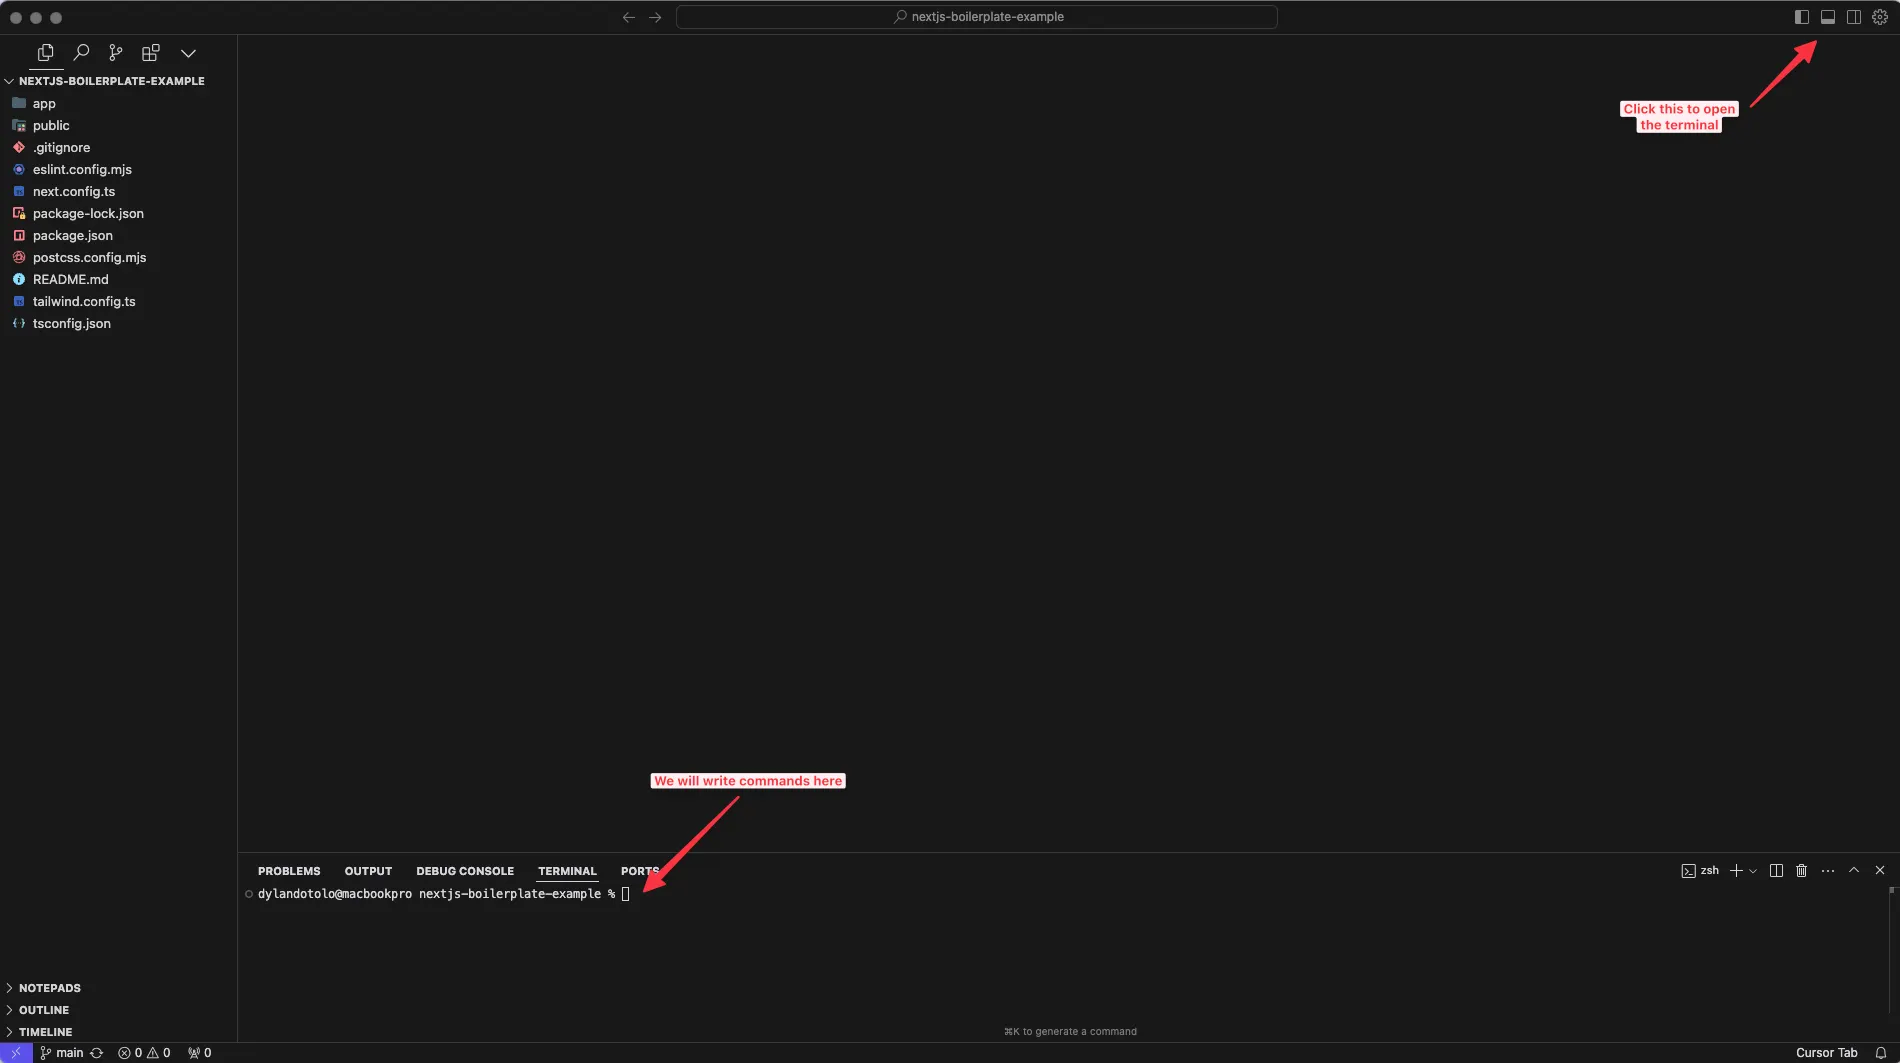
Open Your Project: Launch Cursor and open the folder where you cloned your Next.js template.
Now, to complete our project setup we will open the terminal and run the following command.
npm install
Then to get it running on your local host: http://localhost:3000/
npm run dev
You’re now all set! You have a development environment with Next.js, a repository for version control, and Cursor as your primary tool for building interactive prototypes.
Let’s dive into the next steps.
Setup Cursor for Optimal Prototyping
No one wants to start from scratch — especially when time is of the essence. By integrating pre-built elements like Shadcn components and Remix Icons, you’ll have a solid foundation that accelerates your development process and minimizes the need for repetitive work.
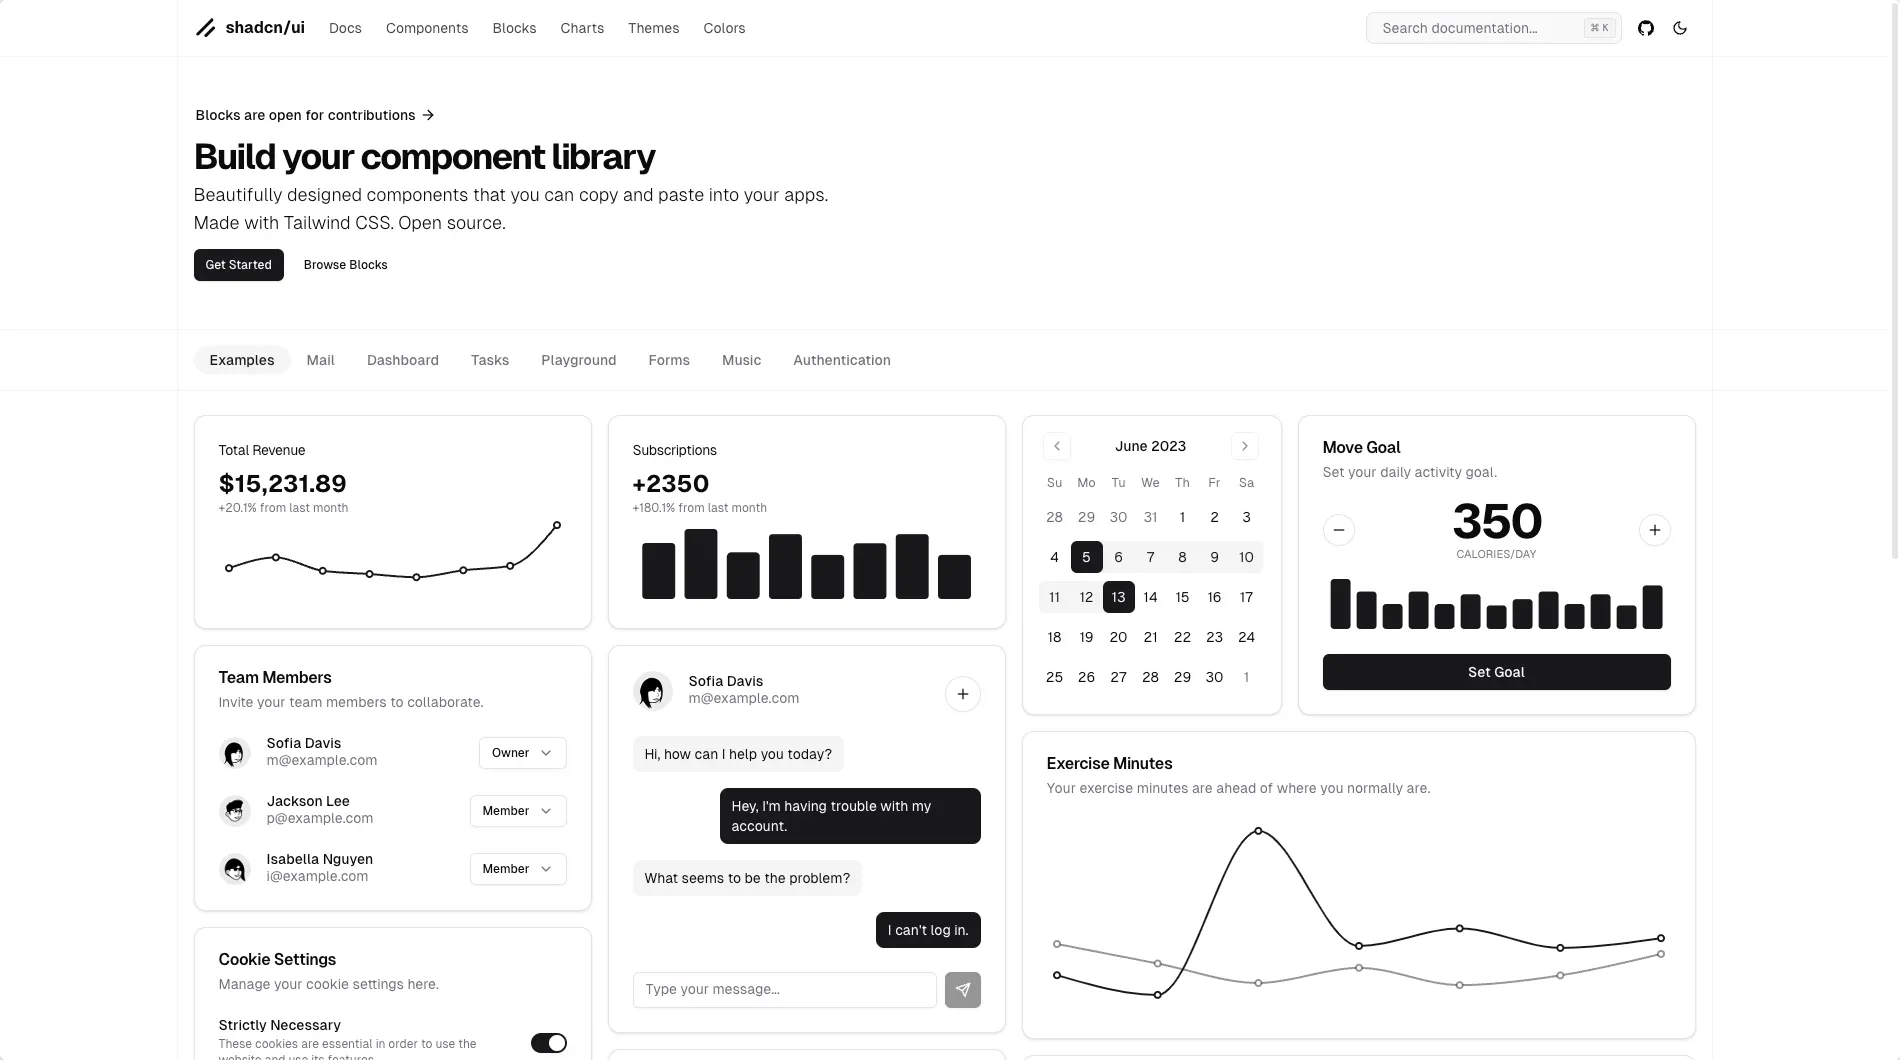
Installing Shadcn components
Shadcn is a library of beautifully designed components that you can easily customize with Tailwind CSS.
To initialize Shadcn components in your project, open Cursor’s terminal and run:
npx shadcn@latest init
 You will be asked a few questions on your preferred style, color, theme configuration and more. Choose based on your preference.
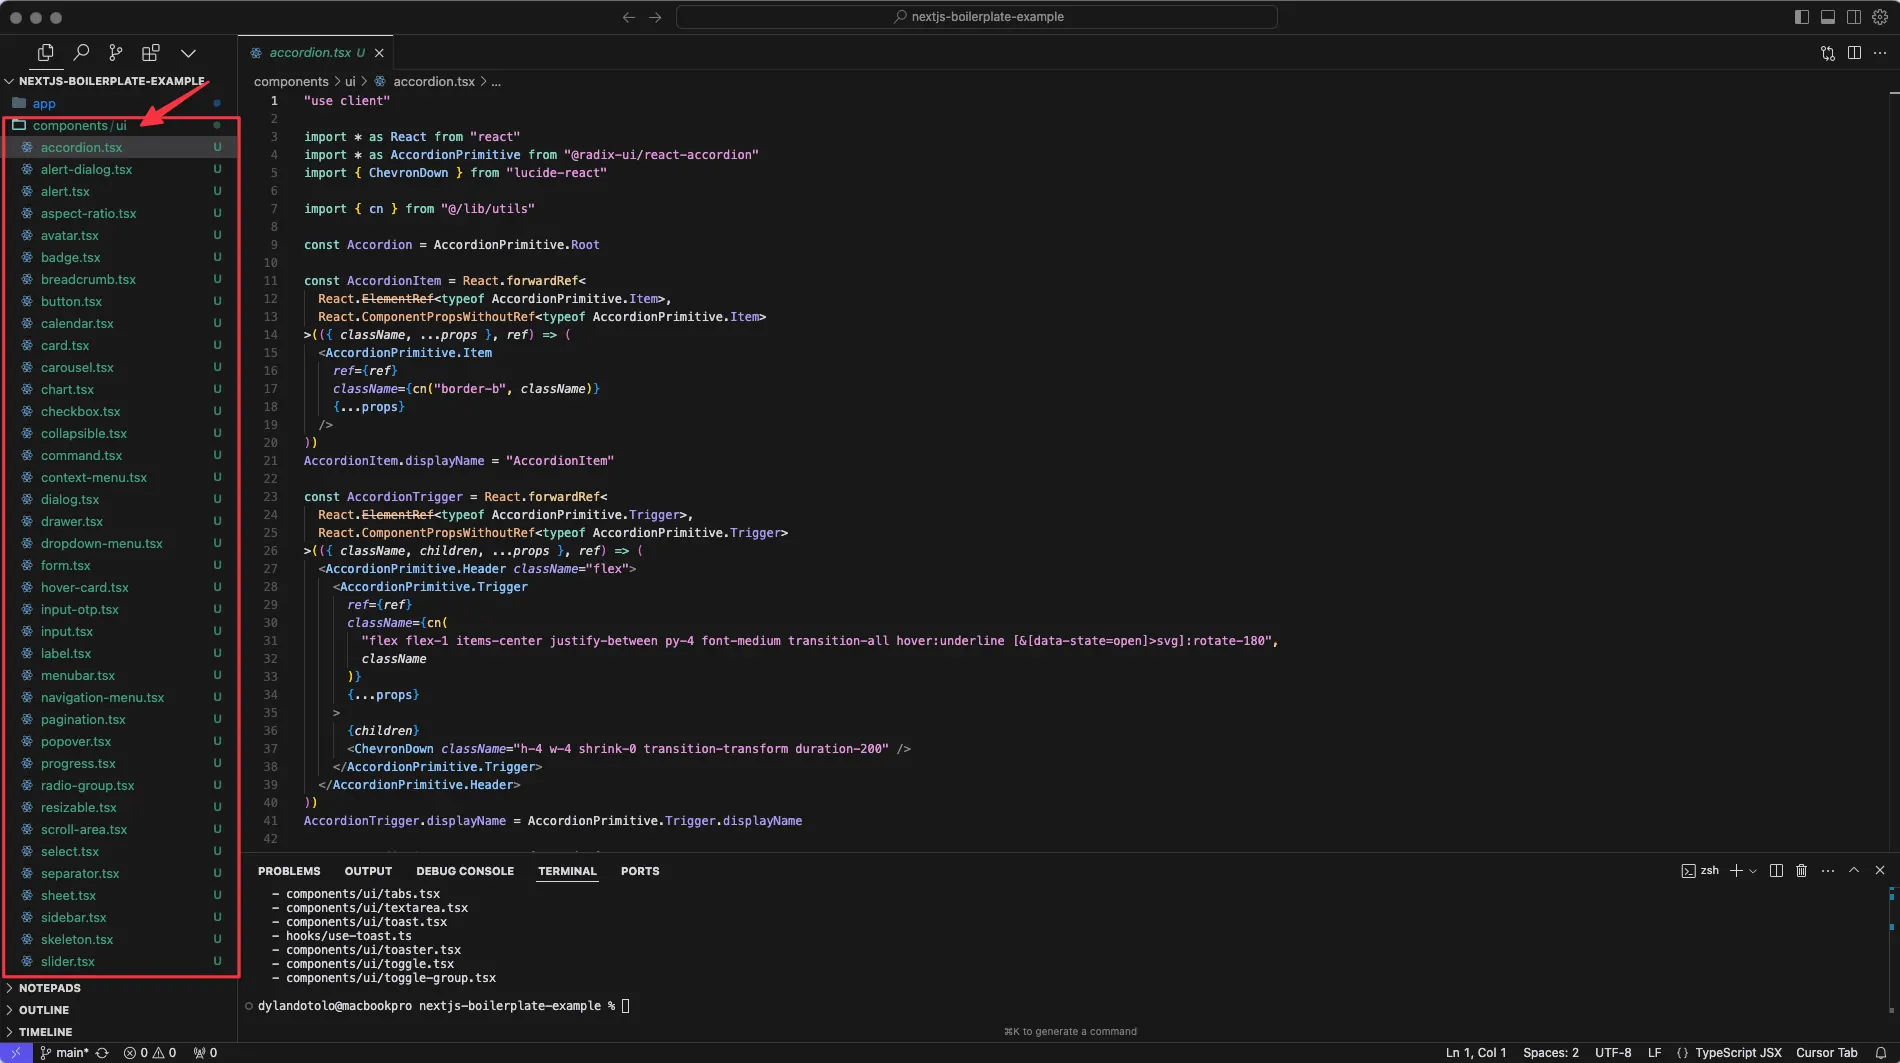
Next we will run the command to install our components. I usually install all of them so I don’t have to worry about it when I am chatting with the Cursor agent.
Run this command below.
npx shadcn@latest add
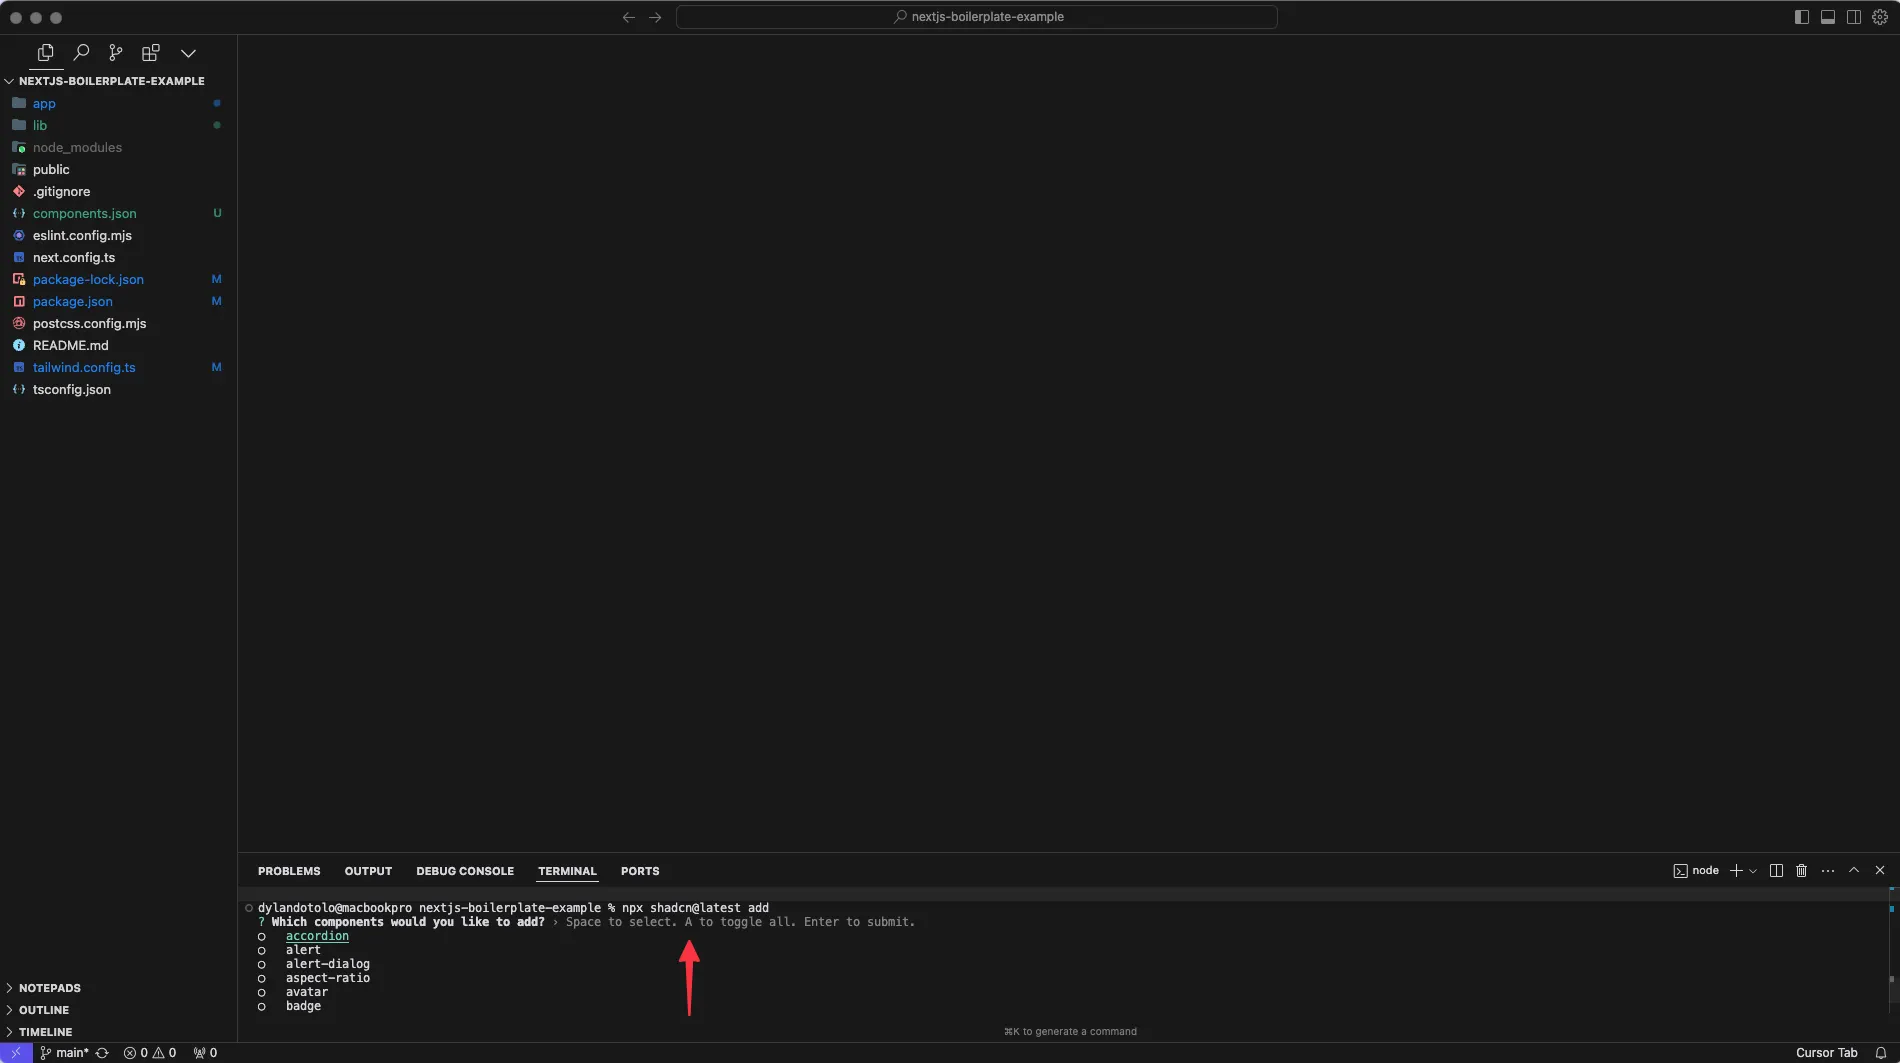 You will be prompted to install all of the components by hitting “A” and then enter.
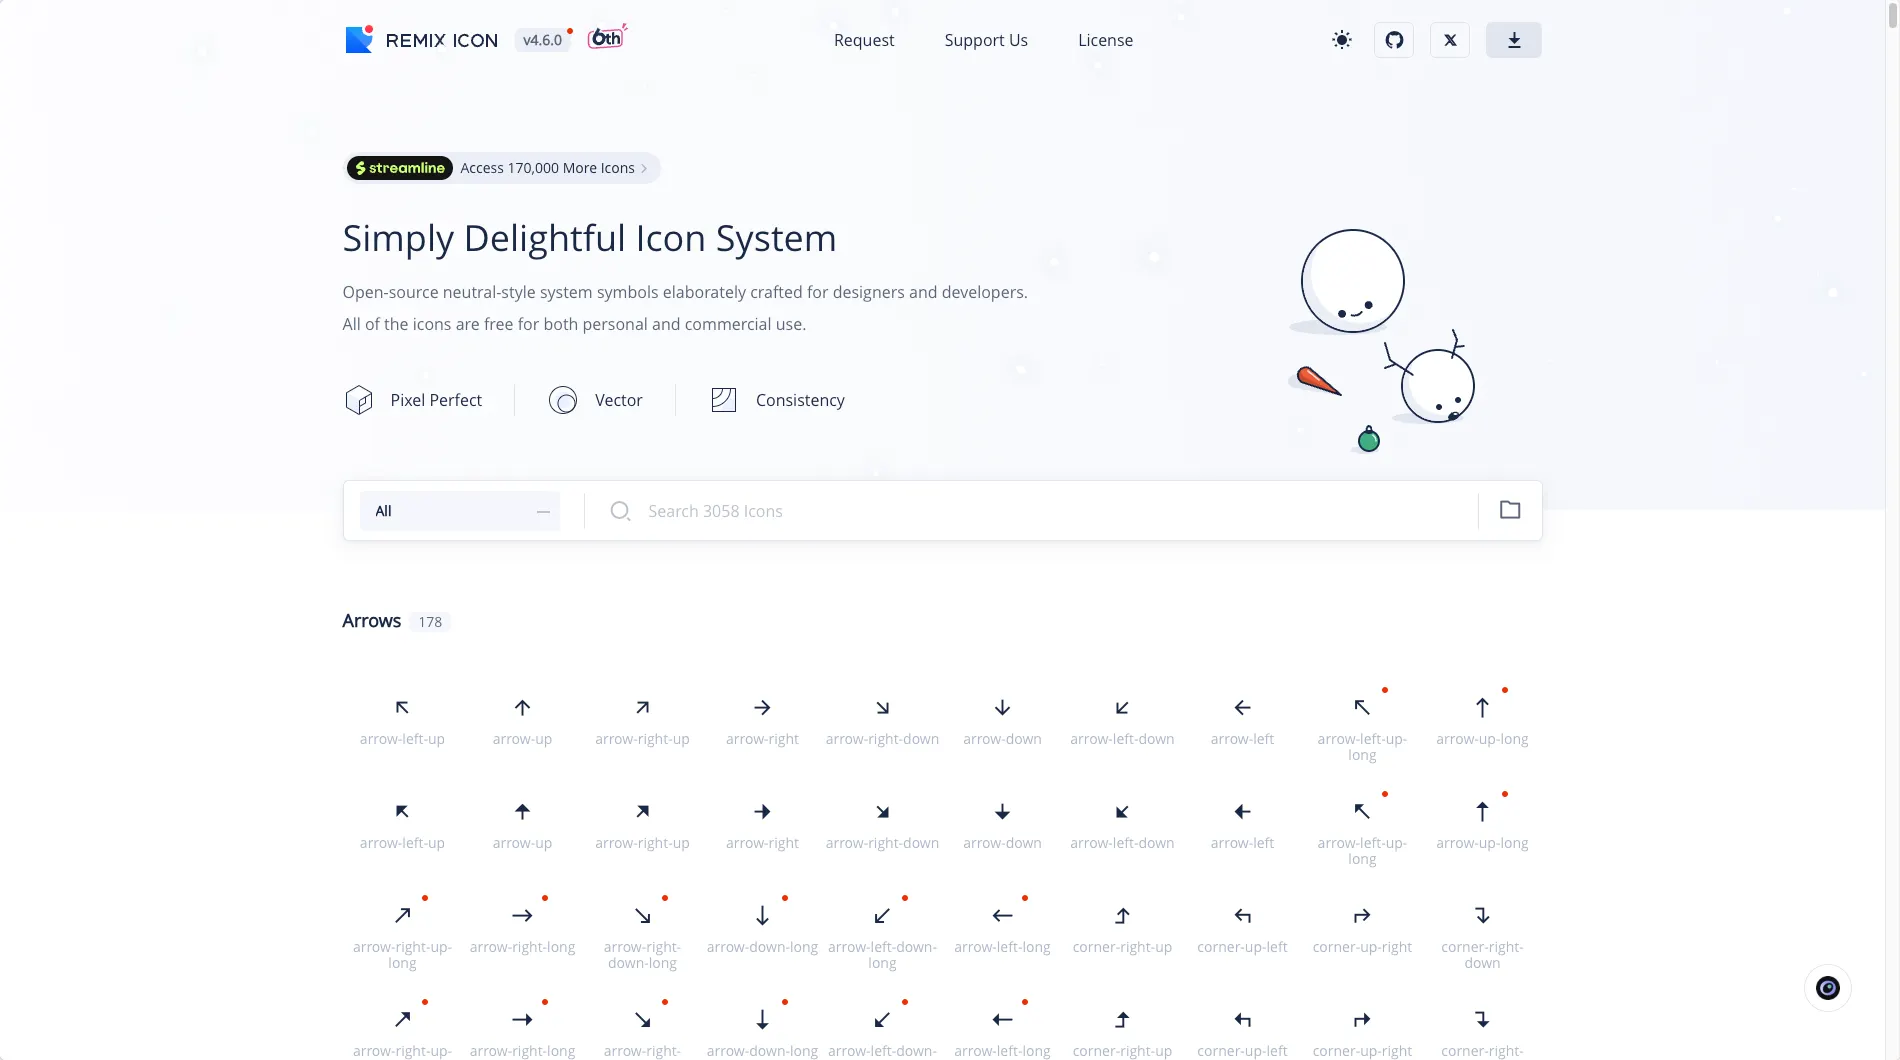
Installing Remix Icons
I like the Remix Icon set for most of my projects. They look great and have a ton of options. Plus they provide an easy NPM package for us to add and start working with. Feel free to install a different library or maybe add a folder of SVG files you plan on using as icons.
npm install remixicon - save
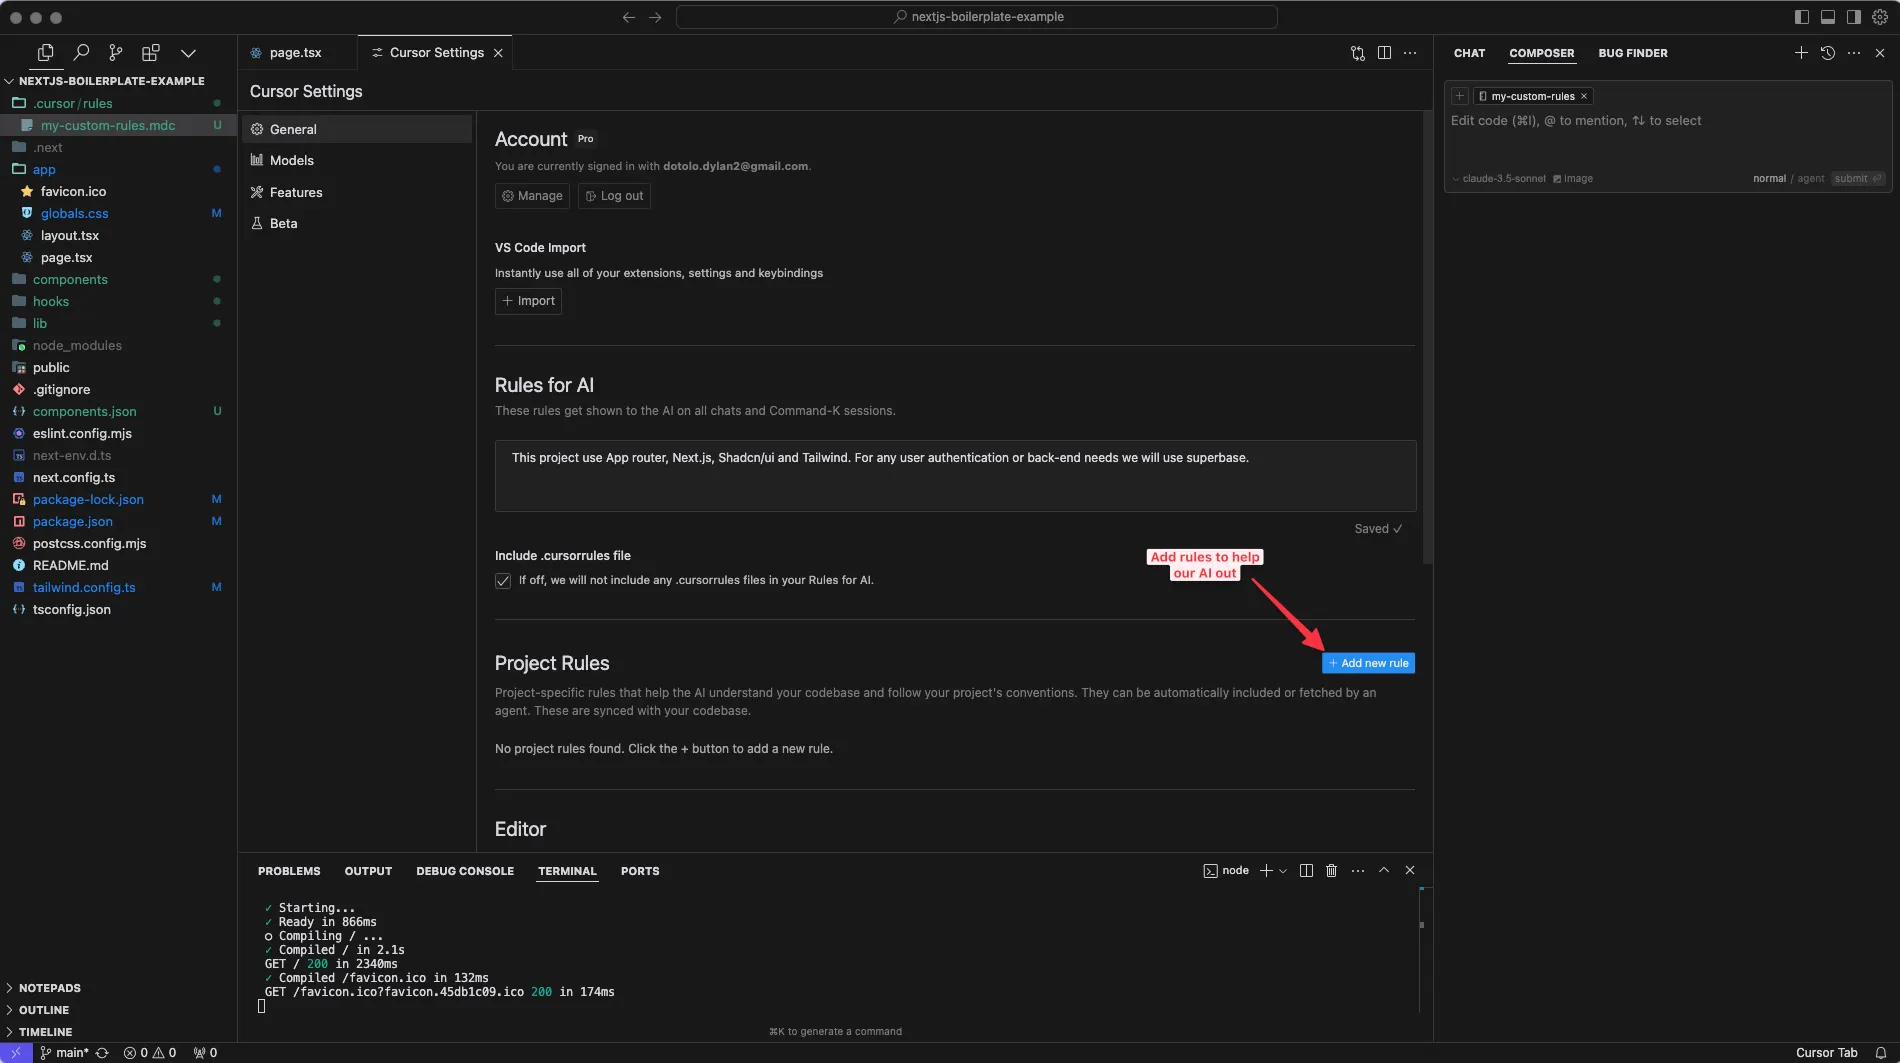
Cursor rules
Cursor rules act as guidelines for the AI, ensuring it follows your project structure and style guide consistently. For this project I use this one you can copy. Otherwise browse the Awesome CursorRules repo to find something that fits your project.
Building Your Prototype with Cursor’s AI
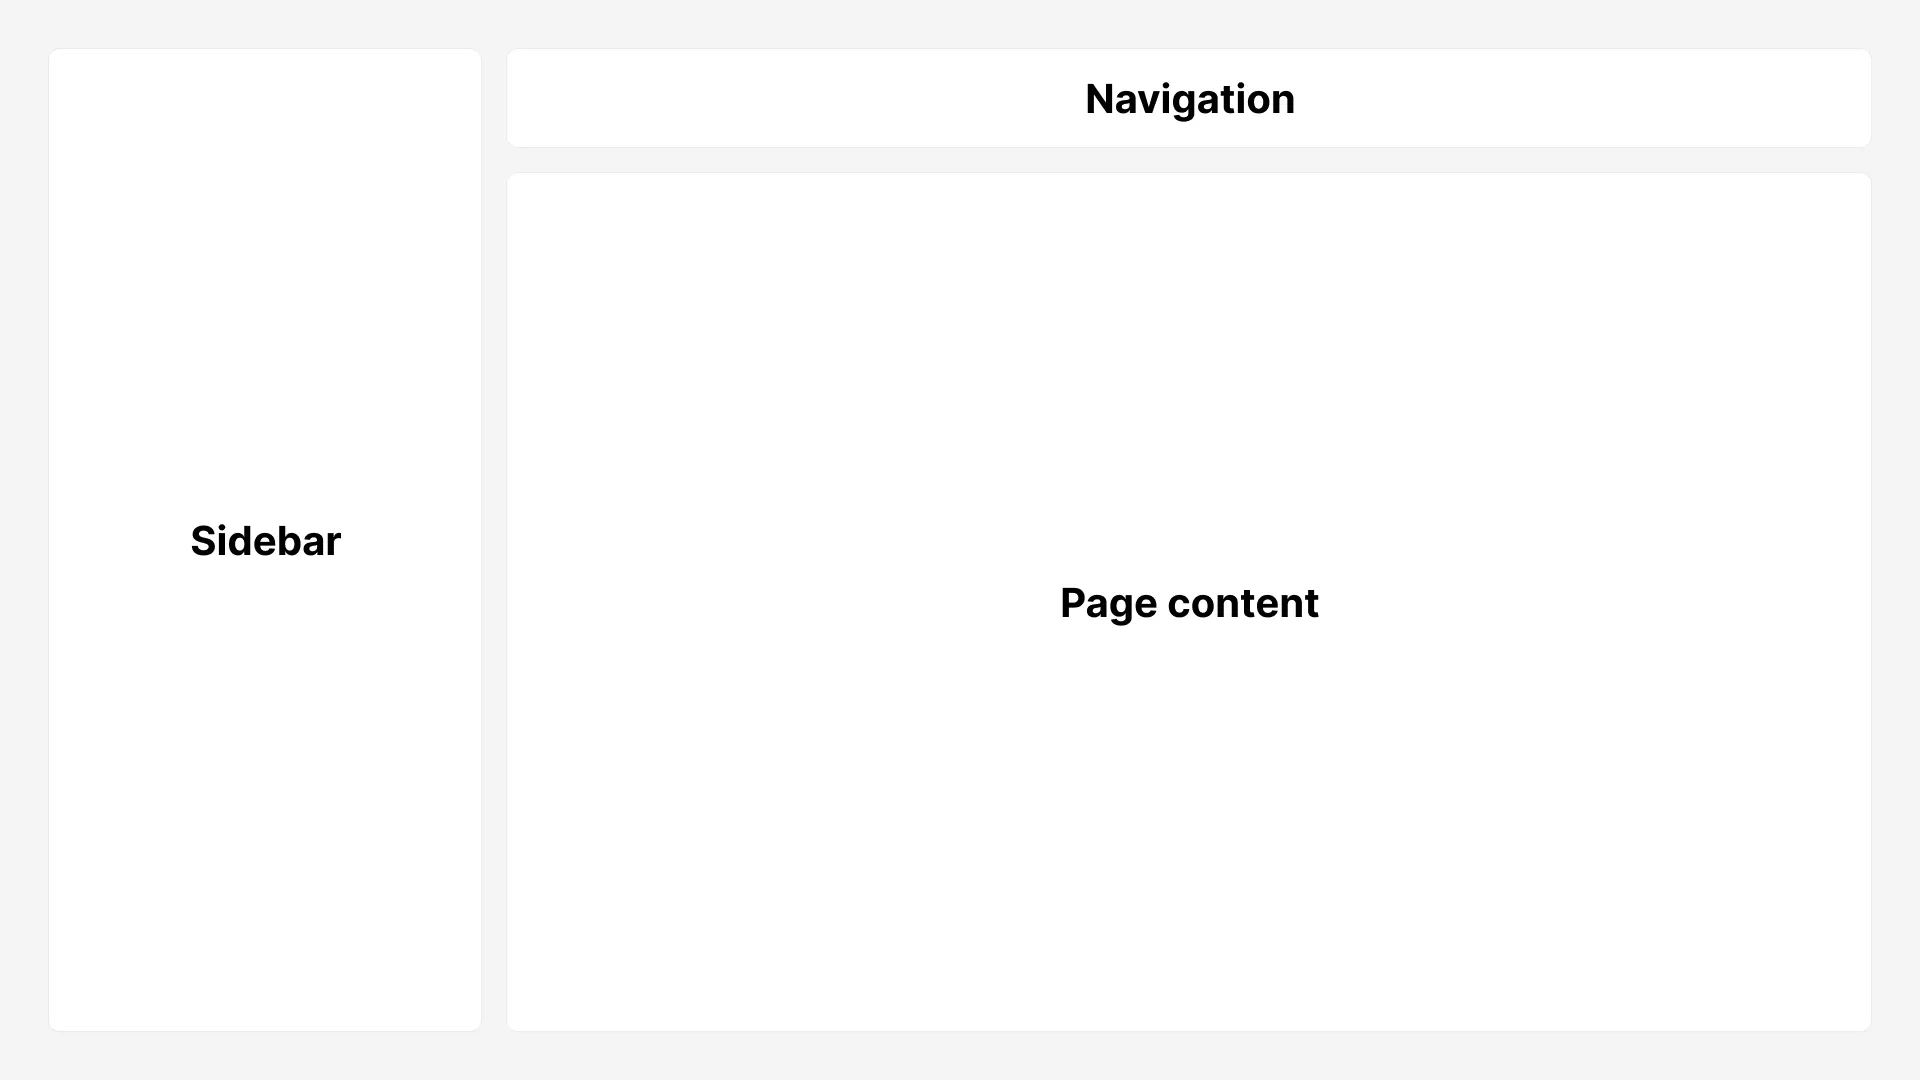
Structure First, Style Later Start by referencing your Figma designs and laying out the basic structure of your prototype. Think about the layout: Will you have a top navigation bar? A sidebar? A main content area? Get the core elements in place first. This structural foundation makes it easier to fine-tune the visual details later on.
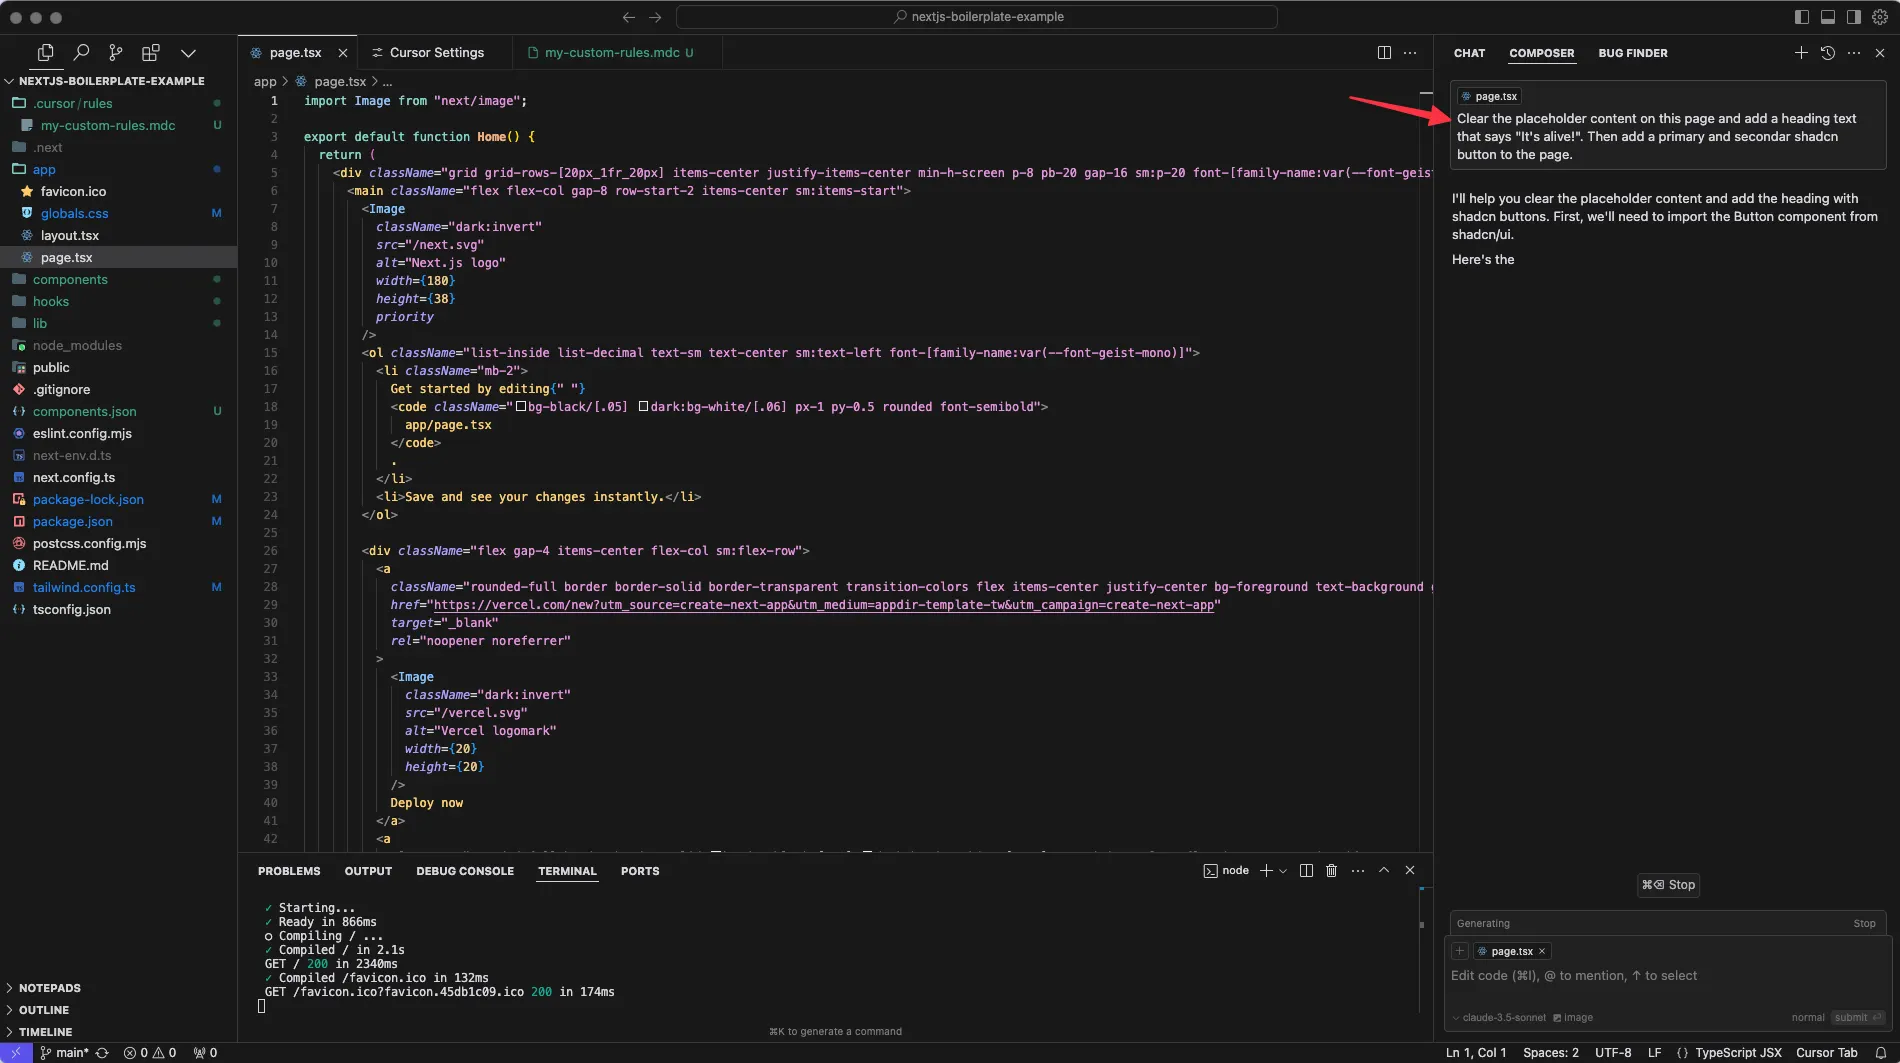
Two Modes of AI Magic Composer Agent Mode: Imagine a coding assistant right inside your editor. In this mode, you can chat with the AI in plain language. For example, you might say, “Create a sidebar navigation with these menu items: Home, Products, About, Contact.” The AI then generates the necessary code, even adding animations or responsive behaviors if needed.
Command + K for Precision: For fine-grained control, use the Command + K shortcut. This mode lets you make precise edits within specific files or components — perfect for adjusting fonts, spacing, or reorganizing elements with pinpoint accuracy.
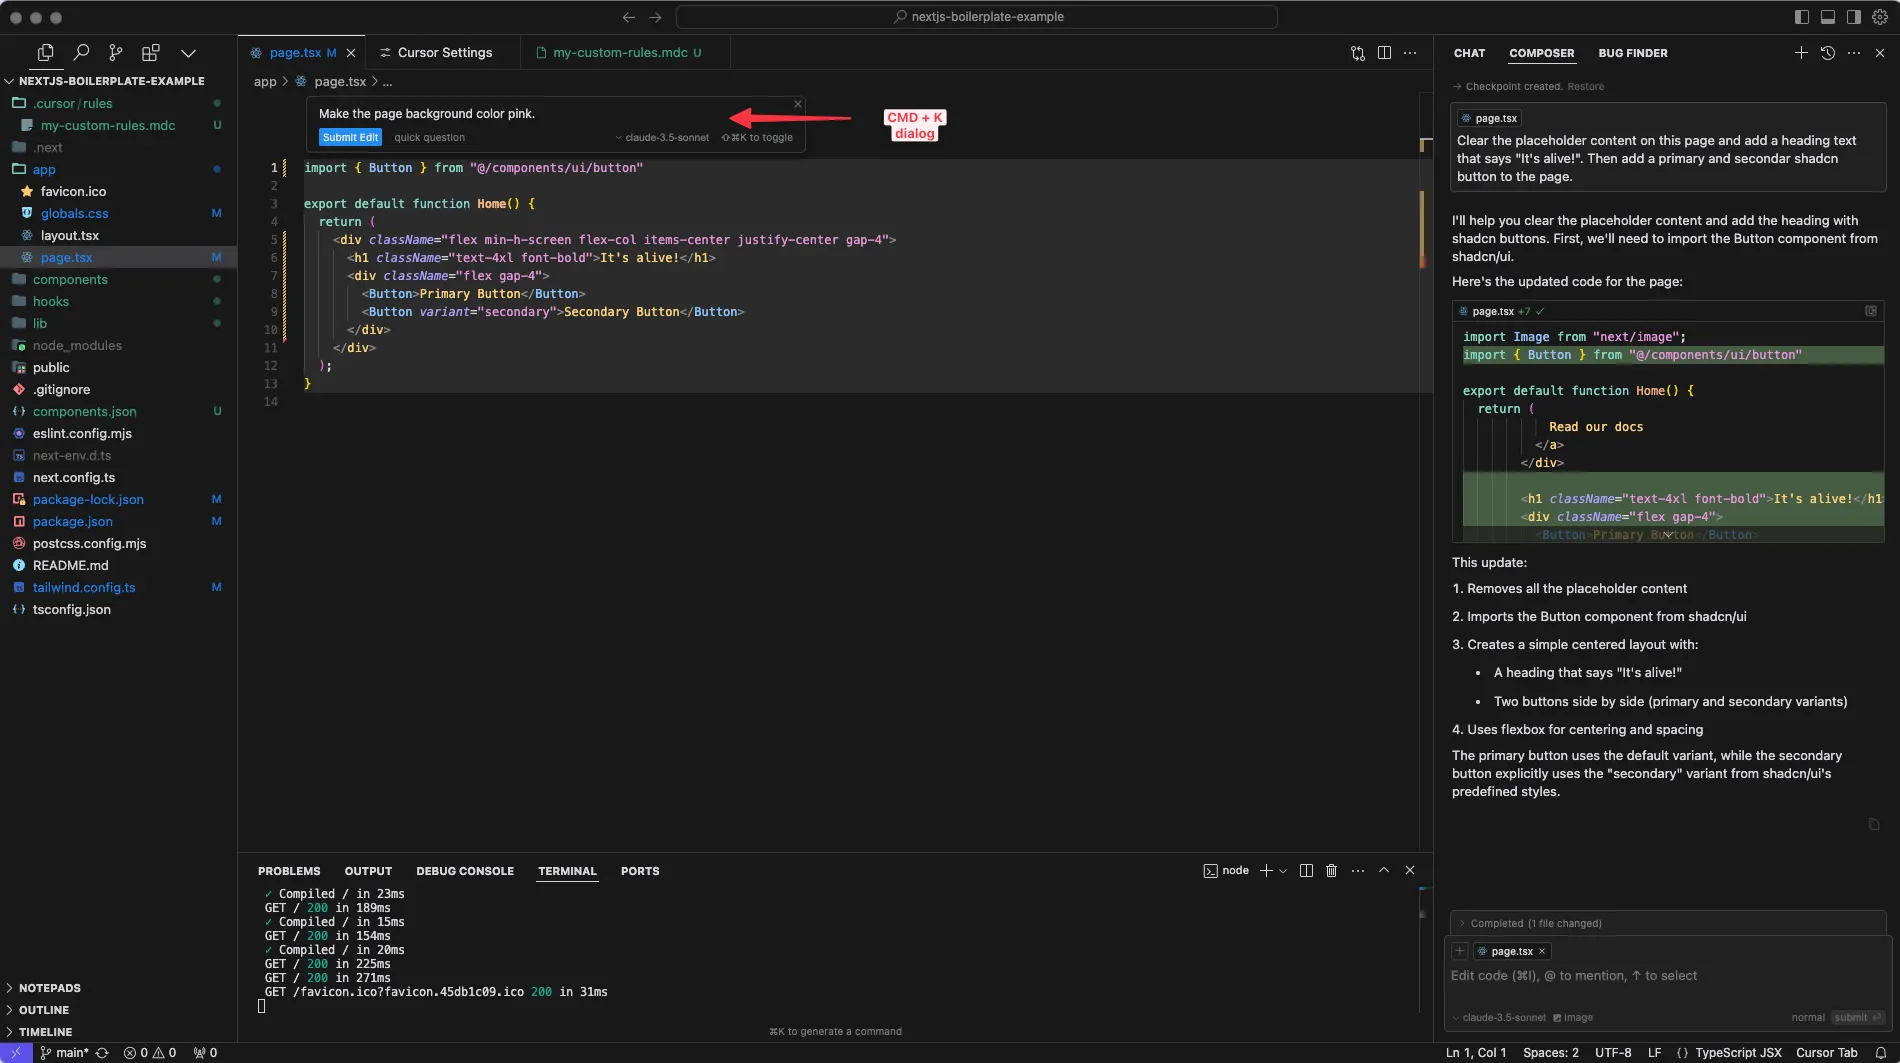 By seamlessly switching between these modes, you can tackle big-picture functionality and detailed design refinements with ease.
Sharing and Iterating
Collaboration and iteration are key in any design process. With GitHub Desktop and Vercel in your toolkit, sharing and updating your prototype becomes second nature.
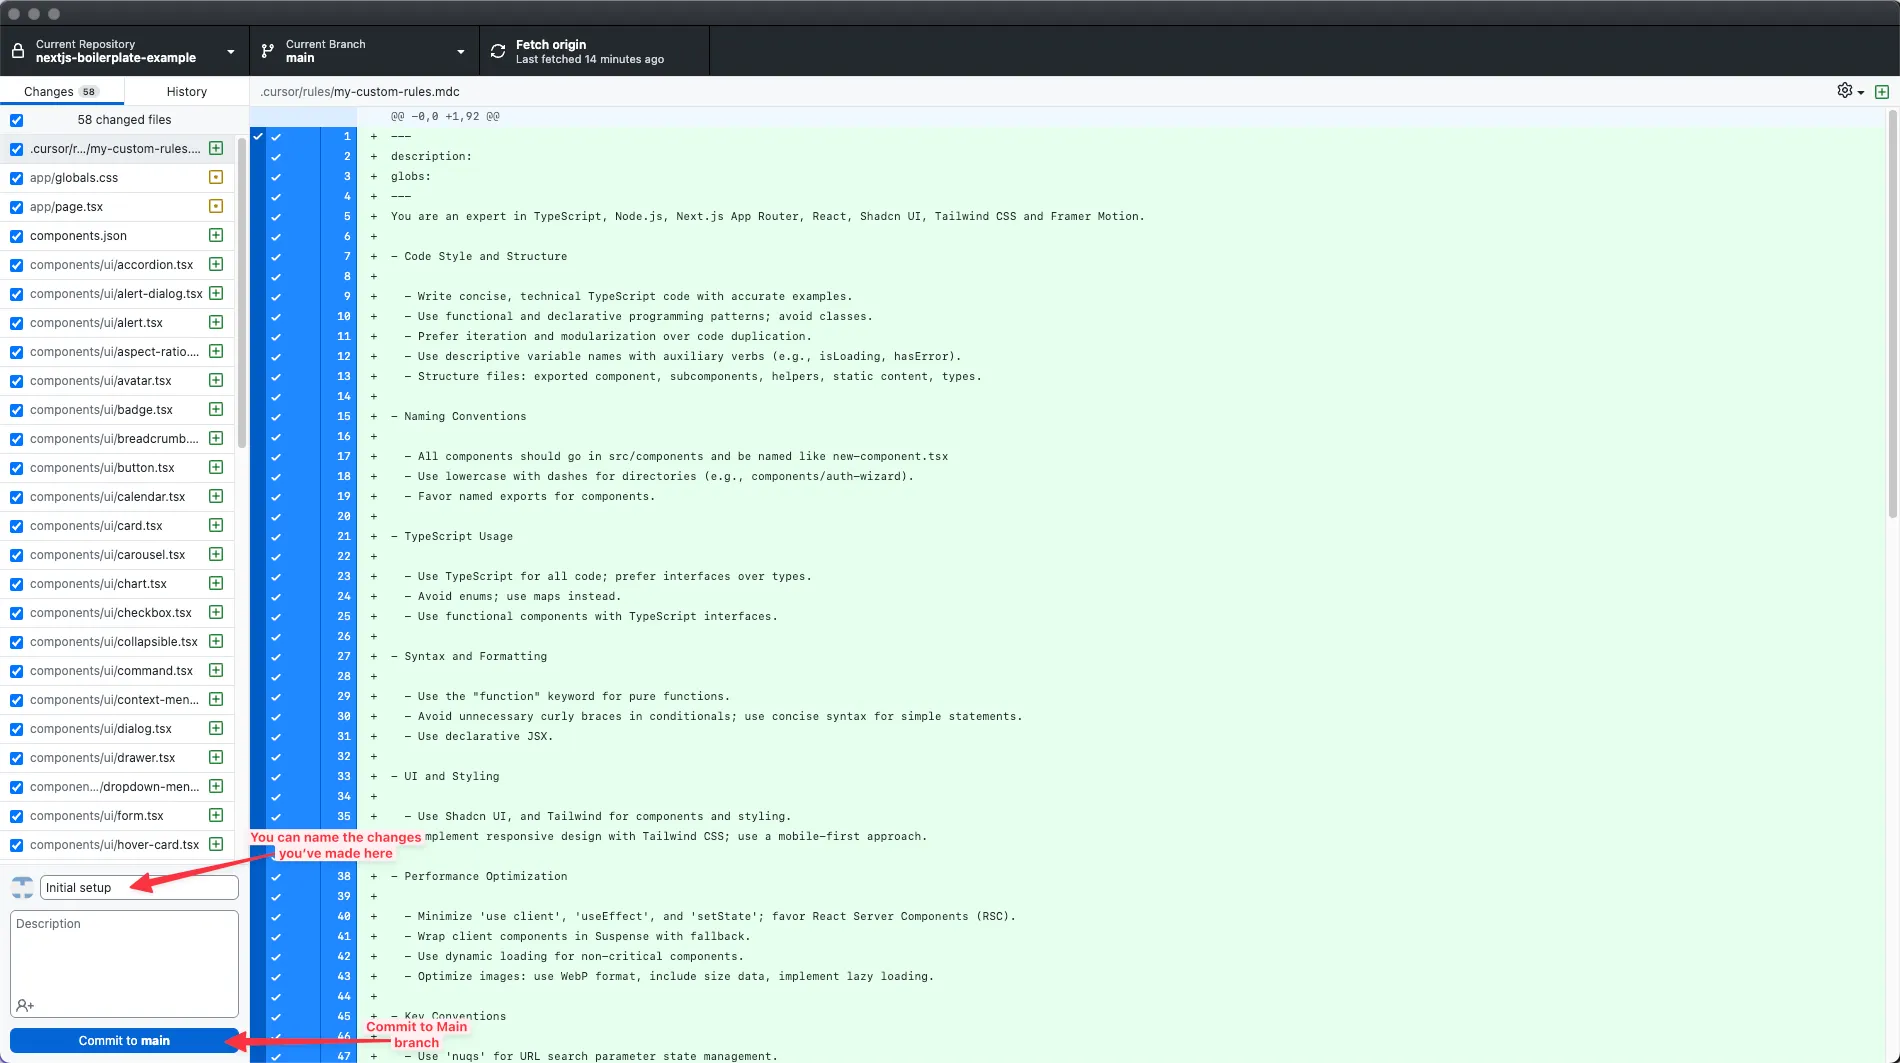
Save Early, Save Often
Regularly commit your changes using GitHub Desktop. This habit not only keeps a version history of your work but also safeguards you against any unexpected modifications introduced by the AI. Experiment freely, knowing you can always revert to a previous version.
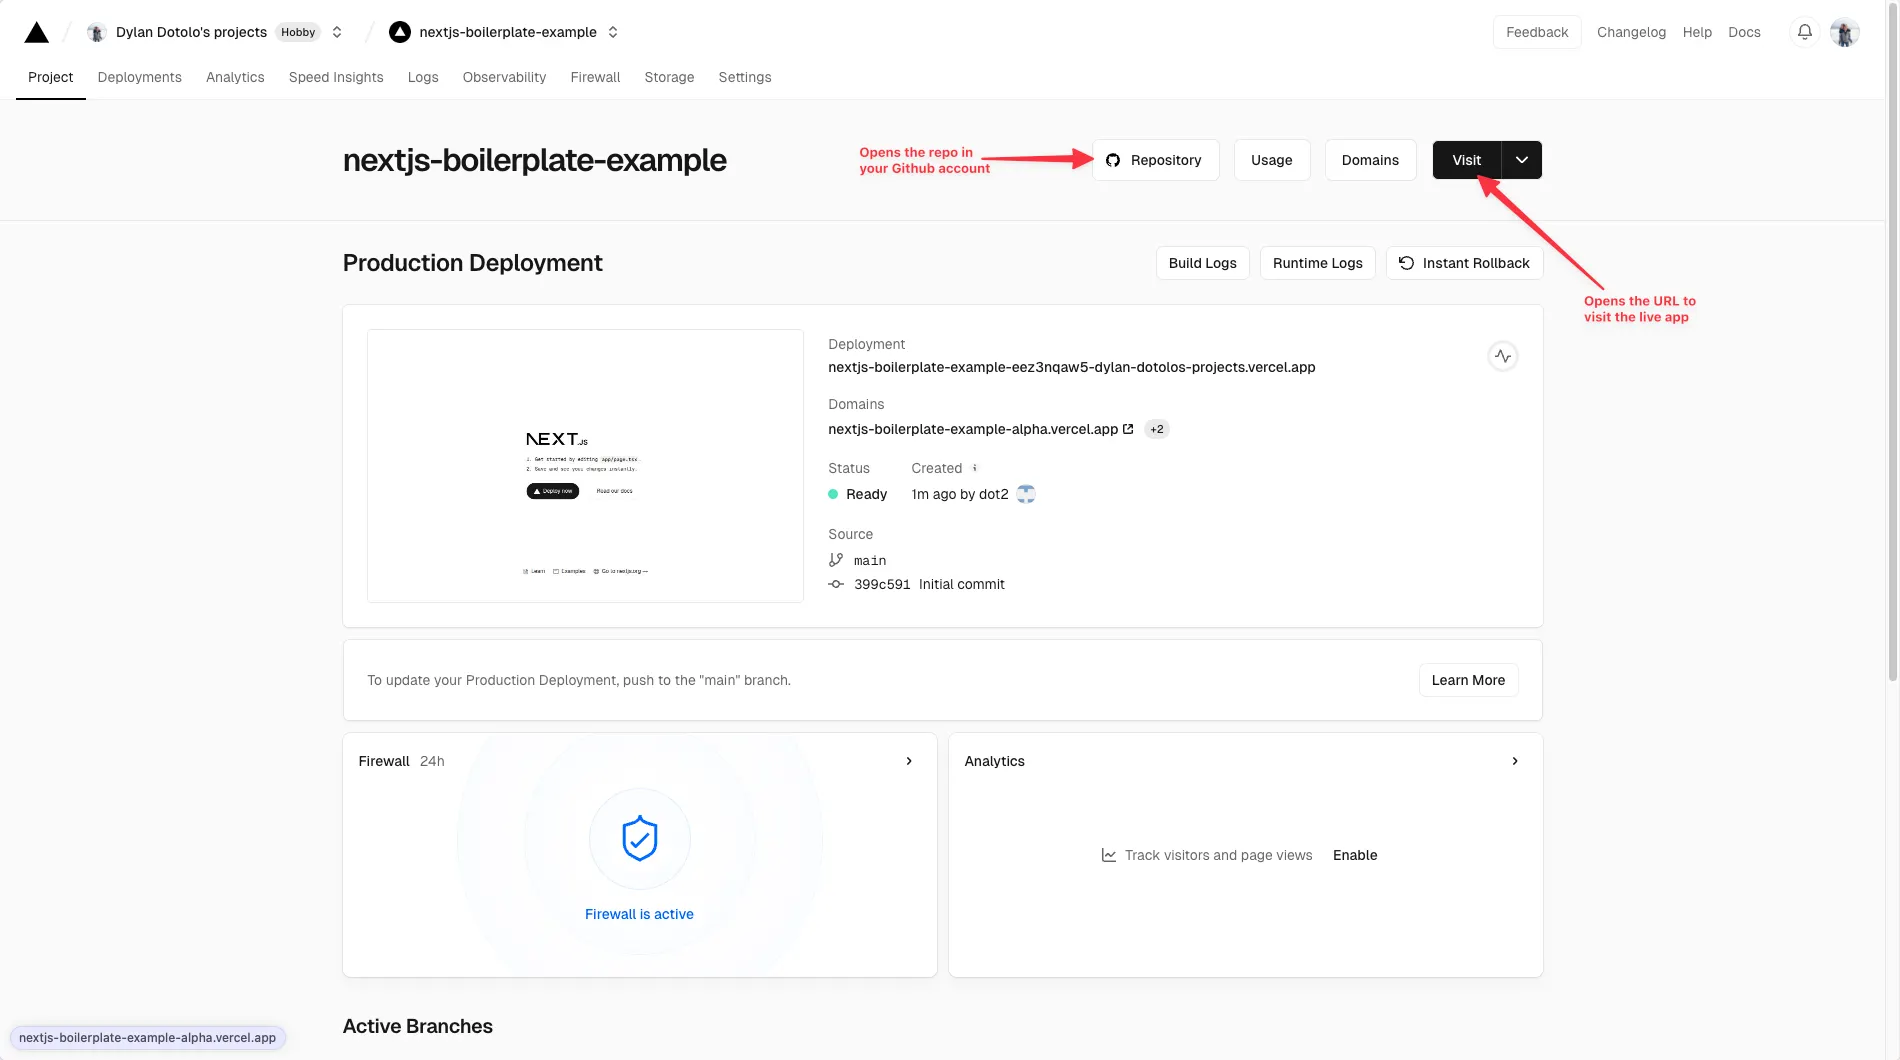
Effortless Deployment with Vercel
Thanks to Vercel’s automatic deployment, every push to your GitHub repository instantly updates your live prototype. Share the live link with your team, stakeholders, or users, and ensure everyone is always looking at the latest iteration.
Conclusion
By embracing AI-powered tools like Cursor, you can break free from the limitations of traditional design handoffs. Instead of sending off static mockups and hoping for the best, you’ll create functional prototypes that clearly communicate your vision. This leads to better collaboration with developers, more effective user testing, and ultimately, superior products.
This approach is especially valuable for:
- Building Your First MVP: Take ownership of your minimum viable product, rapidly testing and validating core features.
- Working with existing code: Collaborate with your Engineers in the same code or pull in unique components to your system.
- User Testing: Collect meaningful feedback on realistic prototypes that simulate actual user interactions.
- Complex Interactions: Develop prototypes with advanced animations, dynamic content, and intricate functionalities that traditional tools struggle to deliver.
Ready to experience the next level of prototyping? Embrace the power of AI, unlock your coding potential, and let Cursor bring your design ideas to life. Happy prototyping!